Setup CDN for a Coolify project
Coolify is a popular self-hosting solution to easily manage your own applications, with one-click installation for many of the most popular services.
Our integration makes adding our global CDN, WAF, image optimization, and static failover services as easy as deploying your apps to Coolify!
QuantCDN is a proud sponsor and contributor to the Coolify project.
Requirements
Section titled “Requirements”- Ensure API access is enabled for your Coolify instance from the “Settings” page
- Your Coolify server must be accessible over HTTPS. To achieve this ensure your instance domain is configured with a https prefix (e.g
https://coolify.quant.cloud) and DNS is configured correctly - Generate a read-only API token from your Coolify teams “Keys & Tokens” > “API Tokens” area of your Coolify instance
Step 1: Create a new project
Section titled “Step 1: Create a new project”Create a new project from your QuantCDN Dashboard by clicking the “New Project” link from the sidebar.

Select the “Coolify Application” option and proceed to the next step.
Step 2: Connect to Coolify
Section titled “Step 2: Connect to Coolify”- Enter your Coolify server details (excluding the
https://prefix, for example:coolify.quant.cloud) - Enter the read-only API token generated earlier and click the “Connect” button the validate the connection
- Choose the project and environment you wish to set up
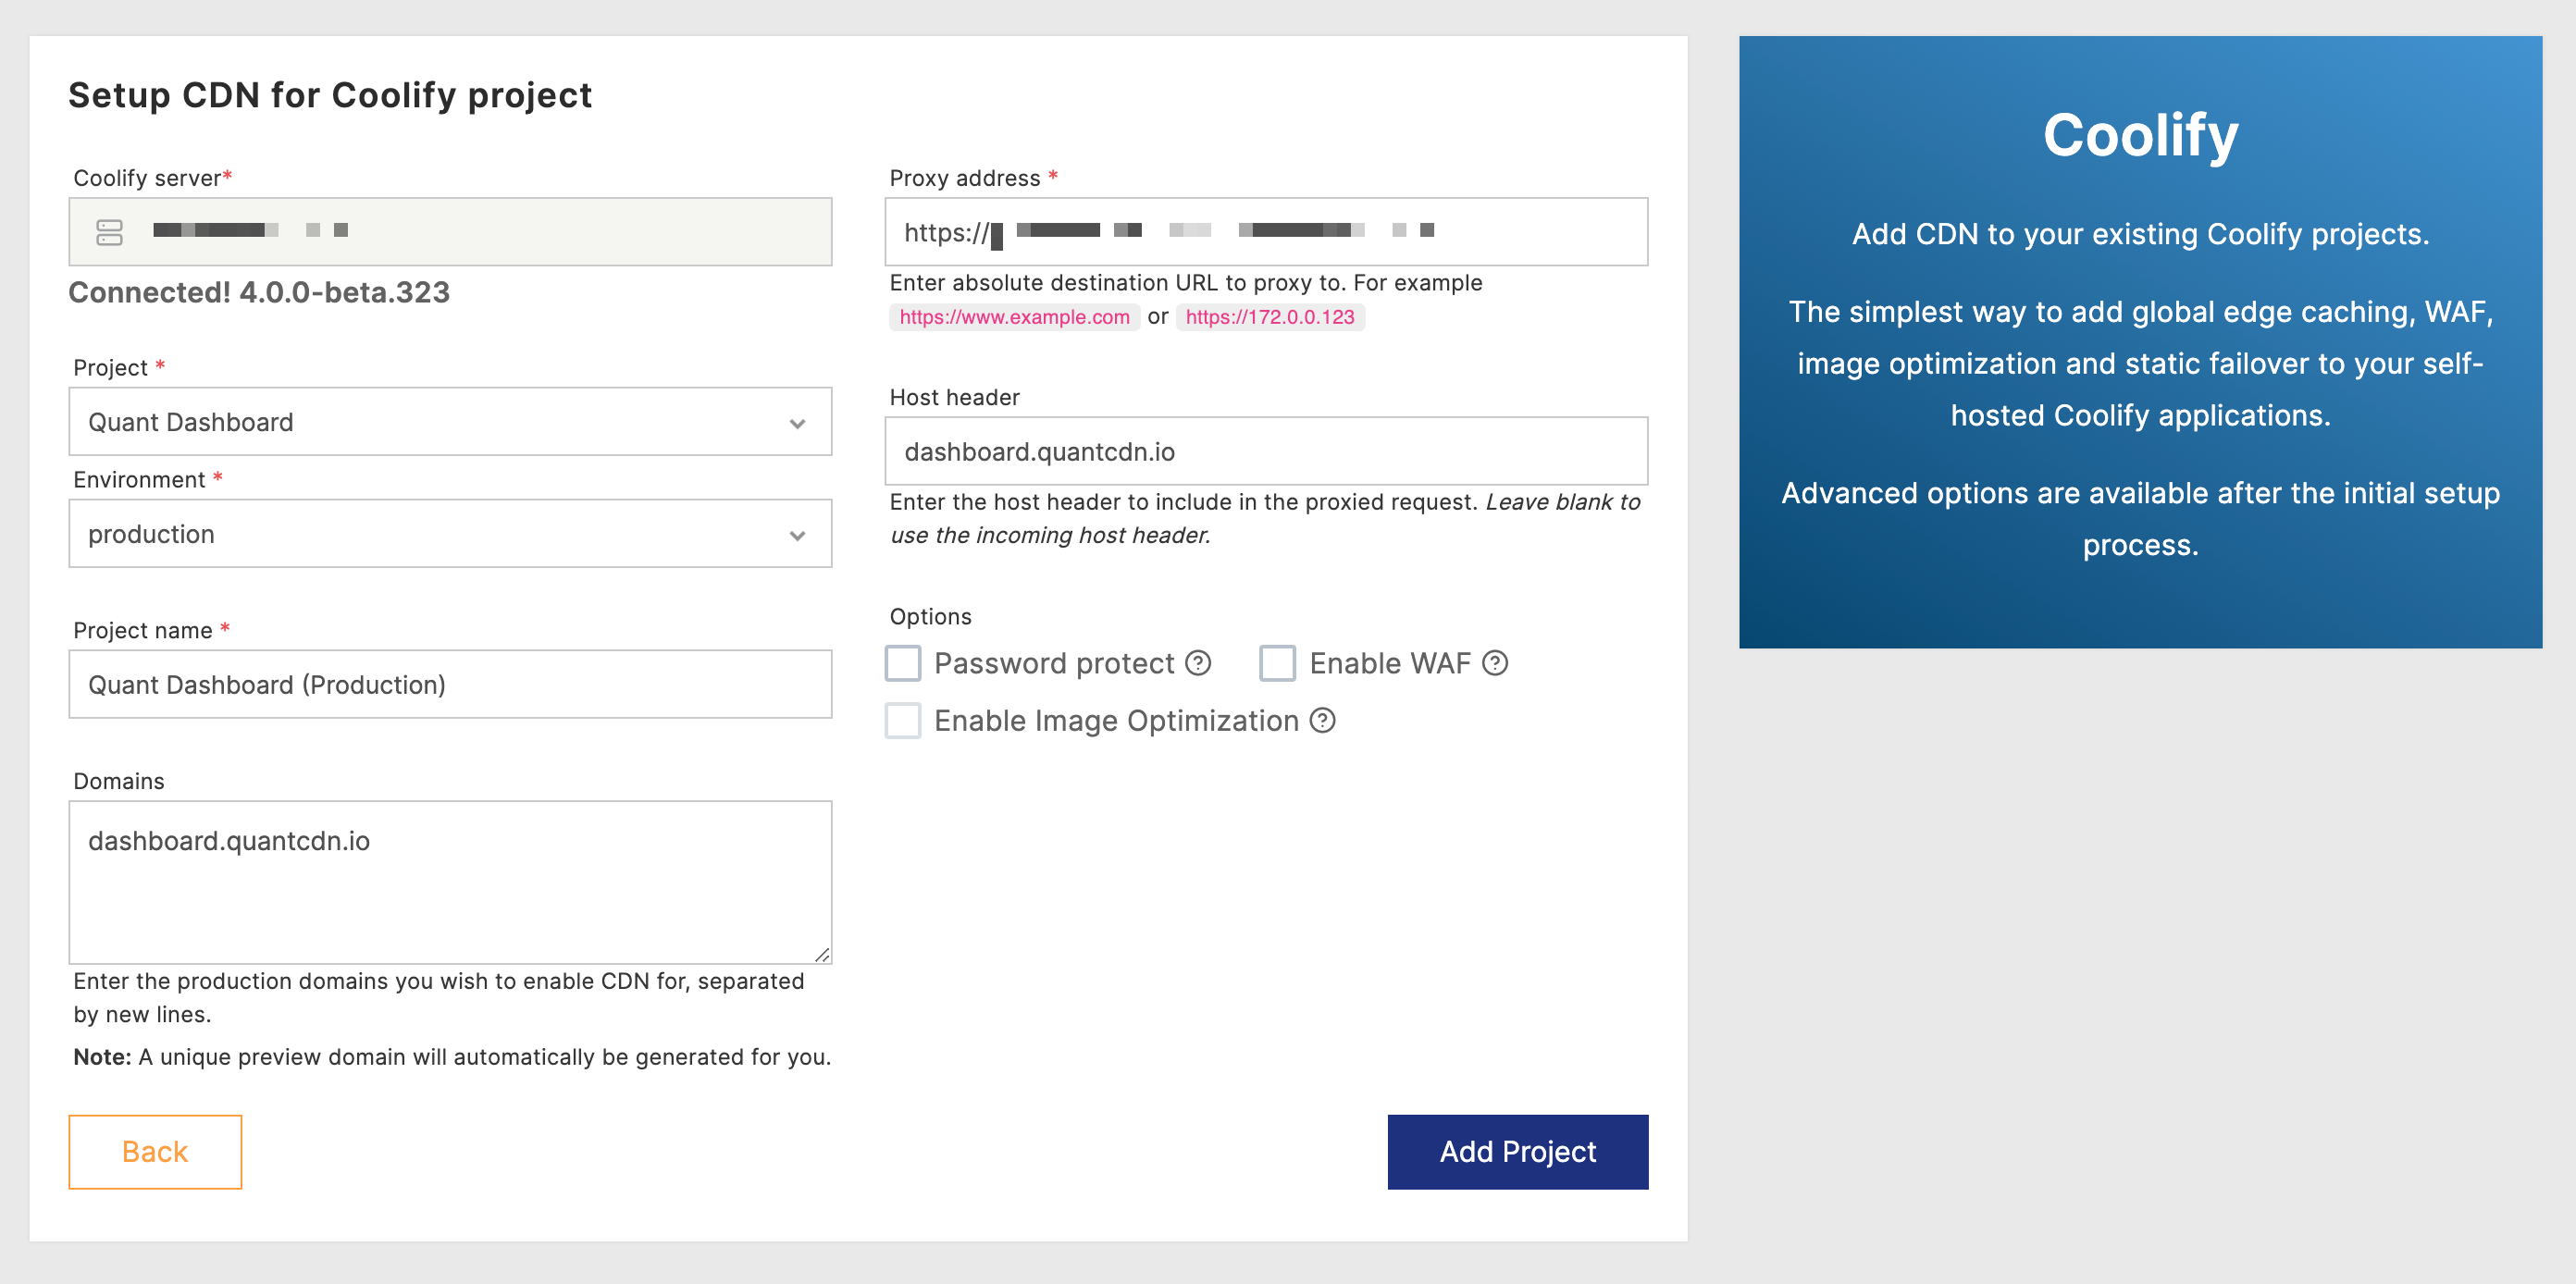
Step 3: Verify prefilled values
Section titled “Step 3: Verify prefilled values”The integration will automatically import the project name, attached domains, and origin server settings, so you should not need to make any changes to the prefilled values.
You may optionally enable password protection, WAF, and image optimization at this stage. You can always enable or update these options (and more advanced configurations) after the initial project setup.
Step 4: Preview site & update DNS
Section titled “Step 4: Preview site & update DNS”At this point you should be ready to go!
Navigate to the Domains section of the Quant Dashboard. You will see a preview domain has already been configured for you which you can use to test your application prior to updating DNS to point to Quant.
Once you are ready to go follow the DNS instructions at the top of the page to update A or CNAME records as appropriate for your domain(s).
Congratulations! Your Coolify project will now be routing through QuantCDN with all of the benefits of a globally distributed edge cache.