Add reCAPTCHA to Quant Forms
Quant Forms have a variety of options to protect against spam, including automatic AI spam detection, honeypot support, geo/IP based restrictions, and the Google reCAPTCHA service.
Adding reCAPTCHA to a Quant Form is a simple process as outlined in this guide.
Step 1: Configure reCAPTCHA
Section titled “Step 1: Configure reCAPTCHA”The first step is to ensure you have a reCAPTCHA project defined in the Google reCAPTCHA admin interace.
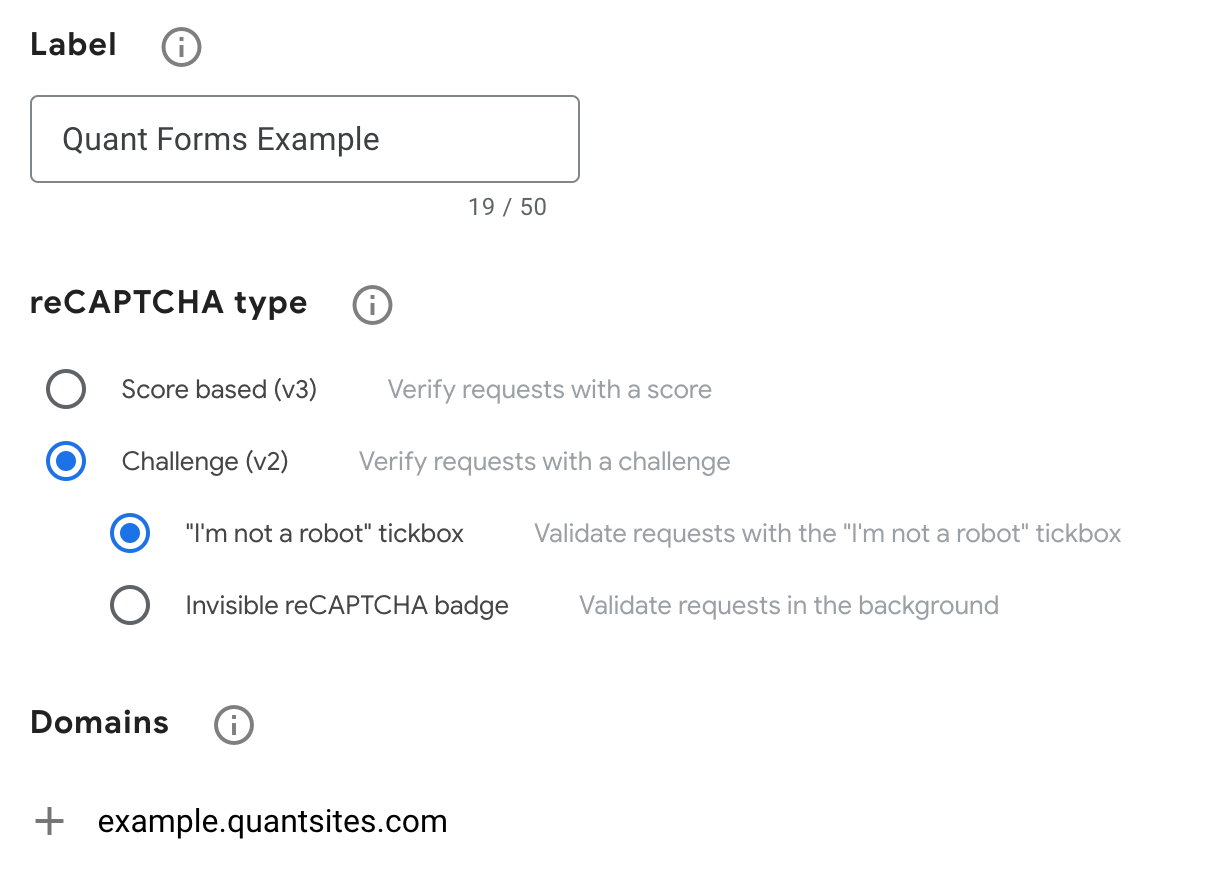
- Give your project a label, and choose the Challenge (v2) option from the list
- Choose between an “I’m not a robot” checkbox, or the “Invisible” option which will automatically validate requests in the background
- Provide one or multiple domains you expect to serve the captcha on. Be sure to include both your production and preview domains
Step 2: Add reCAPTCHA to your form
Section titled “Step 2: Add reCAPTCHA to your form”This step relates to the “client side” change required to display the reCAPTCHA widget to end users.
Read the documentation dependent on whether you are using an “I’m a robot” checkbox or “Invisible” reCAPTCHA type.
Step 3: Add reCAPTCHA to your Quant Form configuration
Section titled “Step 3: Add reCAPTCHA to your Quant Form configuration”This step relates to the “server side” change required to validate the reCAPTCHA response with Google servers.
Quant takes care of this process for you once you add the “Secret Key” to the Quant Form configuration.
- Navigate to the Forms section of the Quant Dashboard
- Click “Edit” on the form you wish to enable reCAPTCHA on
- Add the reCAPTCHA secret key (found under the “Keys” section of the reCAPTCHA admin interface)
That’s it! Your form will now validate requests using reCAPTCHA.