Releasing Your Application on a Custom Domain
Once your application is running in Quant Cloud, you’ll likely want to make it accessible through your own custom domain. This involves creating a CDN project that proxies requests to your application and configuring the necessary routing rules.
Overview
Section titled “Overview”To release your application on a custom domain, you need to:
- Create a CDN project in QuantCDN
- Configure the project with your custom domain
- Update your DNS settings
- Set up proxy rules to route traffic to your application
- Manage SSL certificate management
Step 1: Create a CDN Project
Section titled “Step 1: Create a CDN Project”- Go to the Projects page in your QuantCDN Dashboard
- Click “New project”
- Choose “CDN” from the available options and click Next
- Configure your project:
- Project name: Enter a descriptive name for your project
- Proxy address: Enter the URL of your Quant Cloud application (this will be your application’s direct URL)
- Domains: List the custom domain(s) you want to use (e.g.,
example.com,www.example.com)
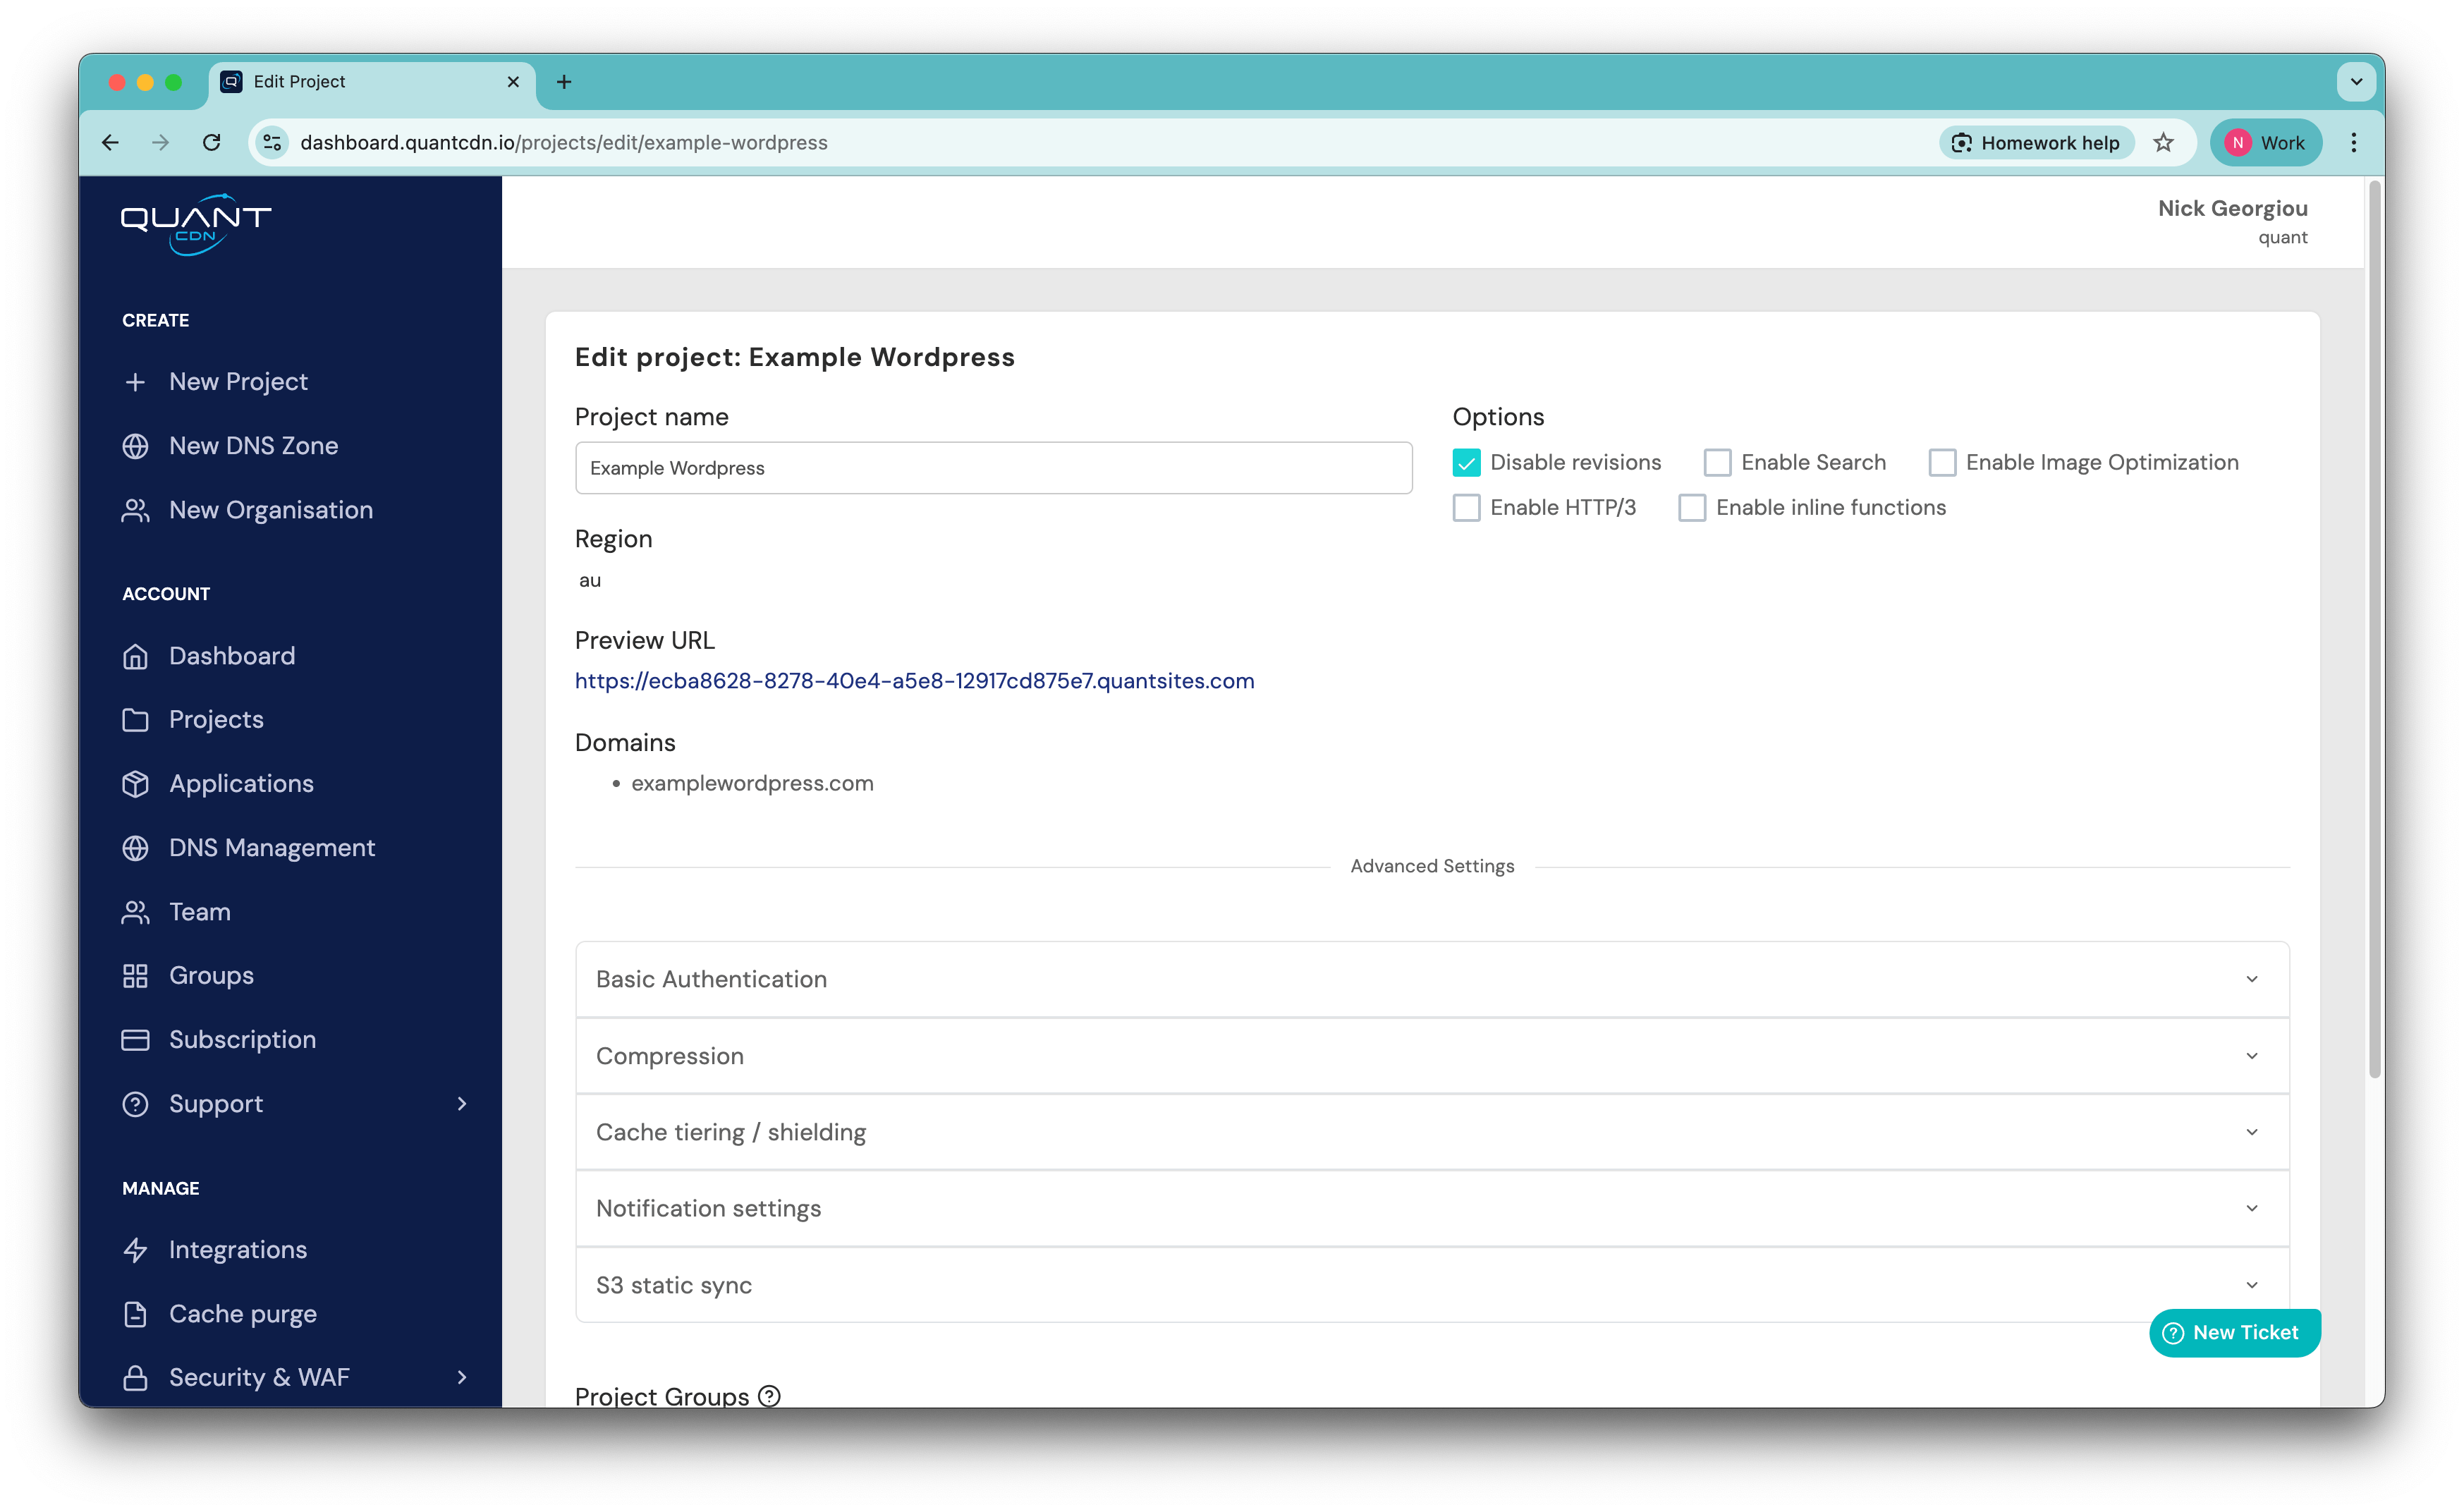
Step 2: Configure Domain Settings
Section titled “Step 2: Configure Domain Settings”After creating your CDN project:
- Navigate to the Domains section of your new CDN project
- Click “Add domain” if you need to add additional domains
- Enter your custom domain name
- QuantCDN will provide you with DNS instructions for pointing your domain to their edge network
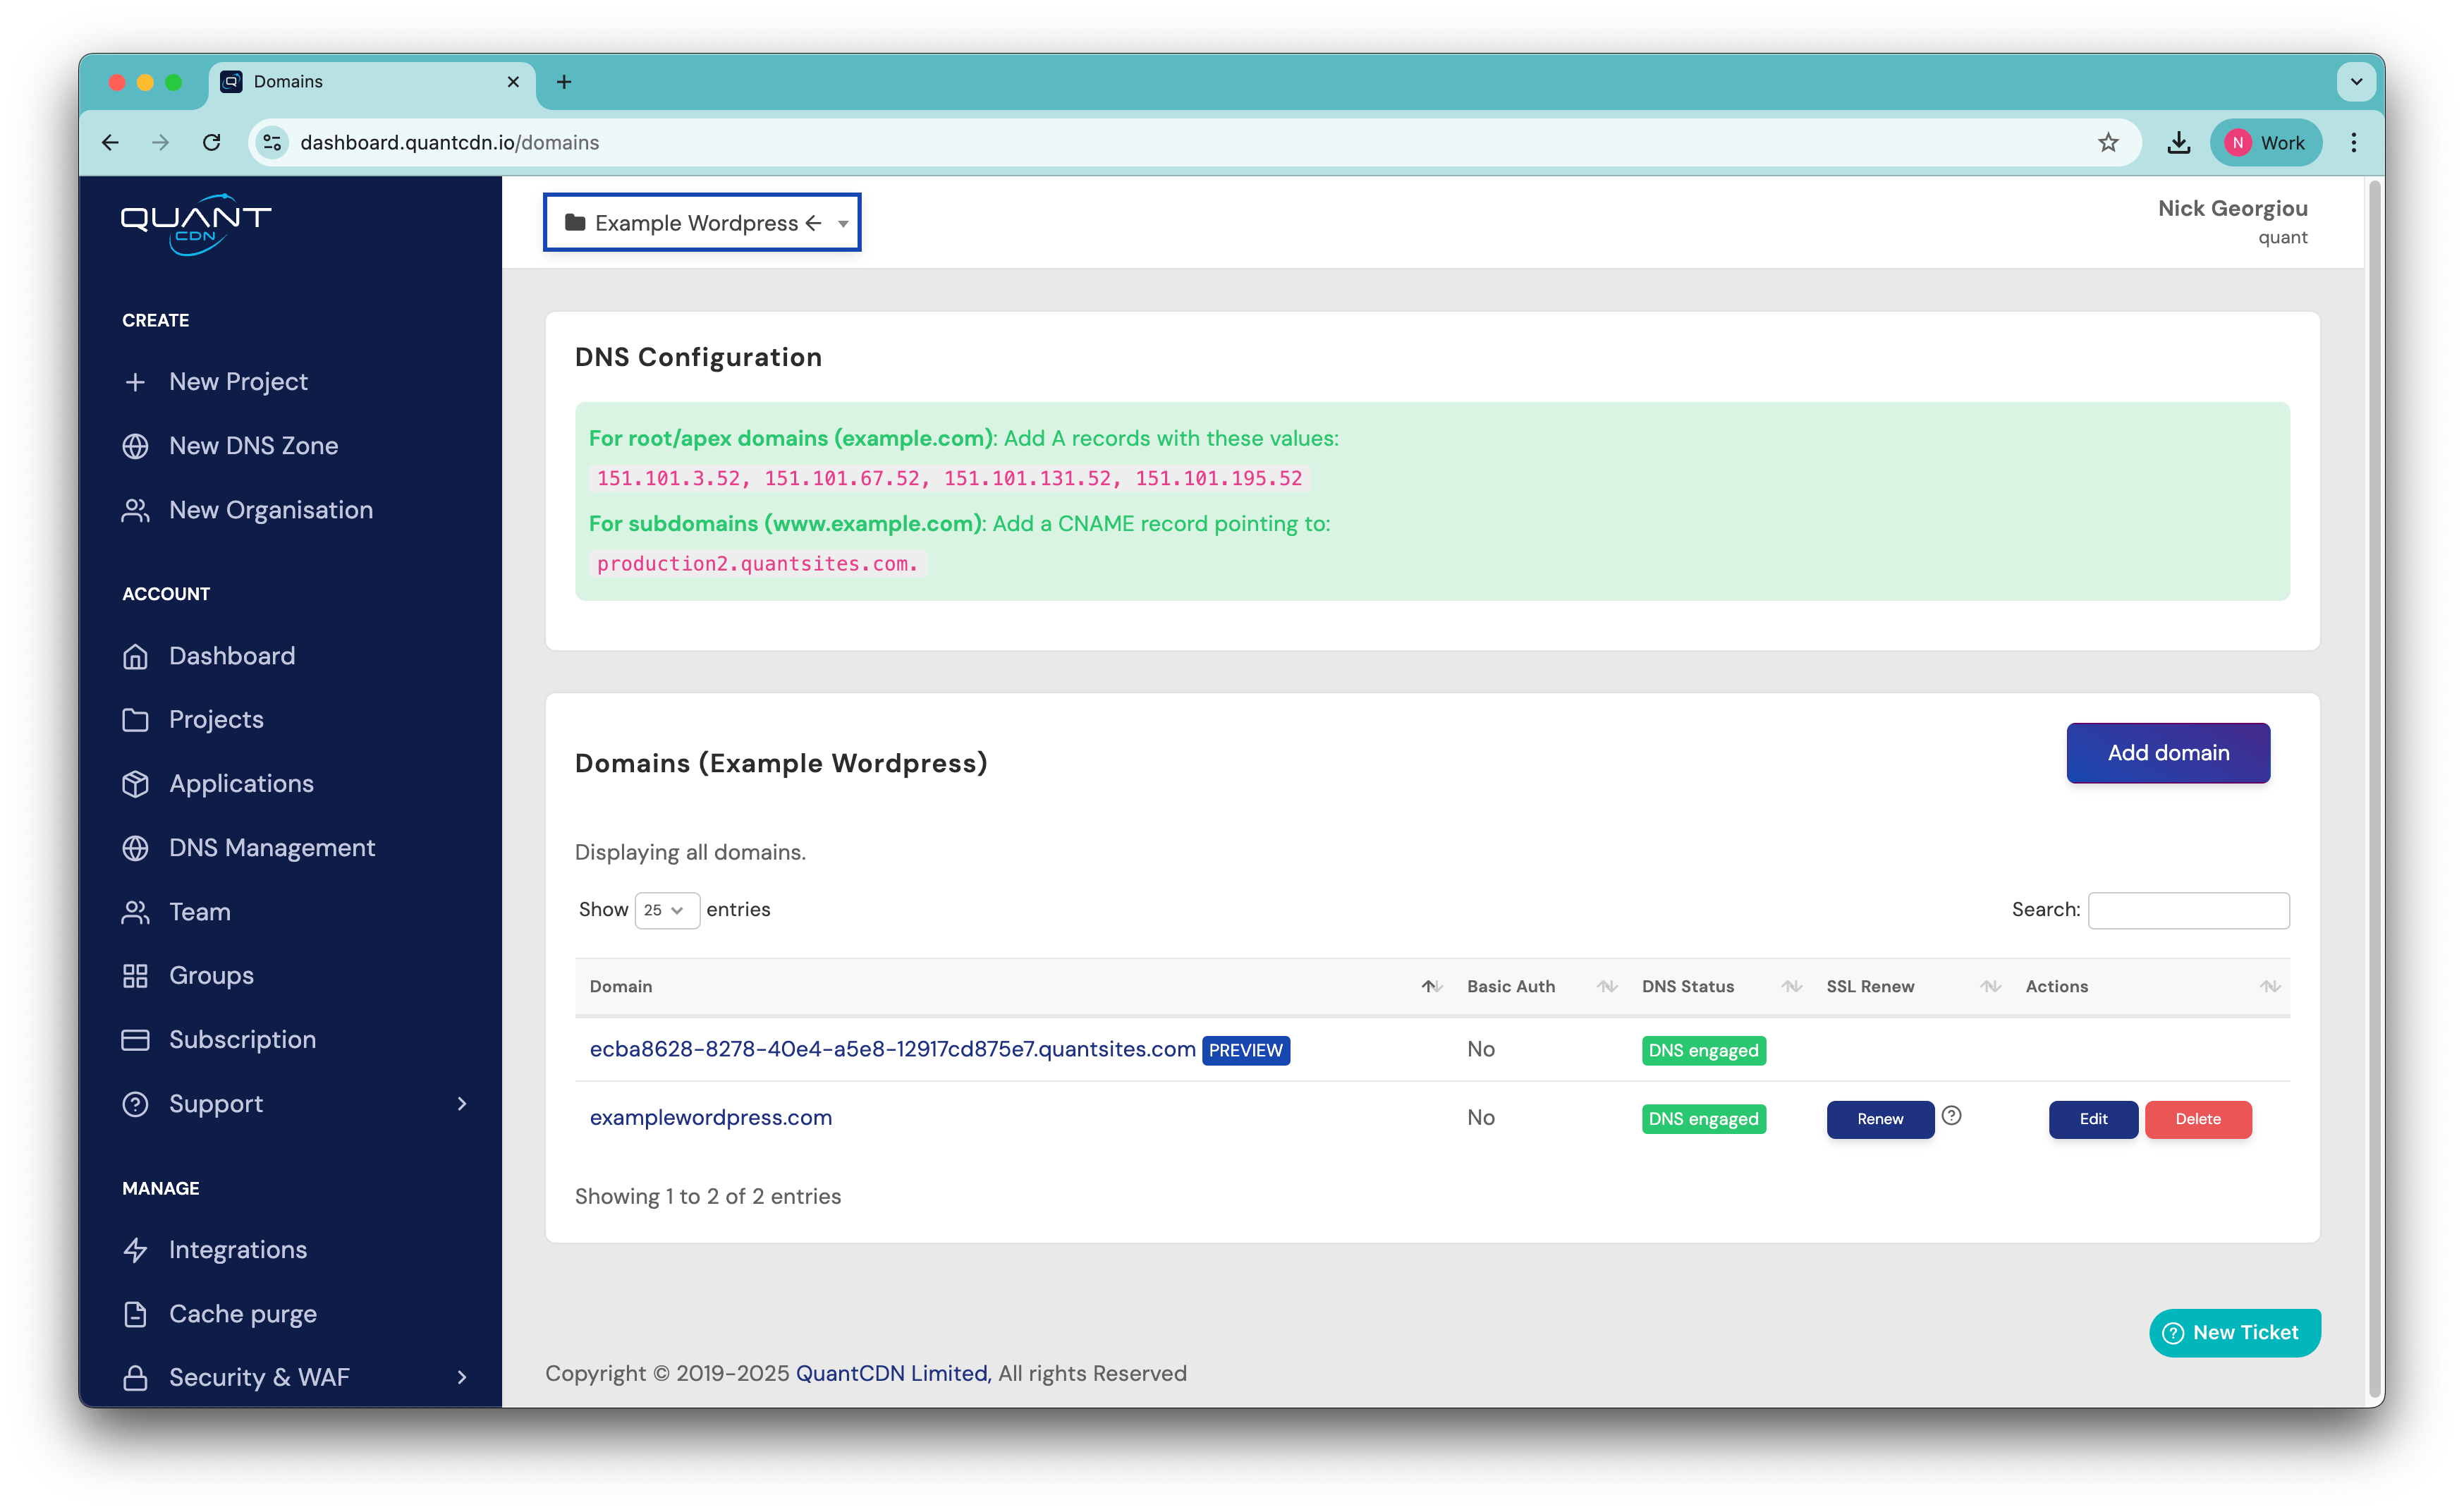
Step 3: DNS Configuration
Section titled “Step 3: DNS Configuration”Update your domain’s DNS settings to point to QuantCDN:
In your domain registrar or DNS provider, enter the details as they appeared on the Domains section of your project.
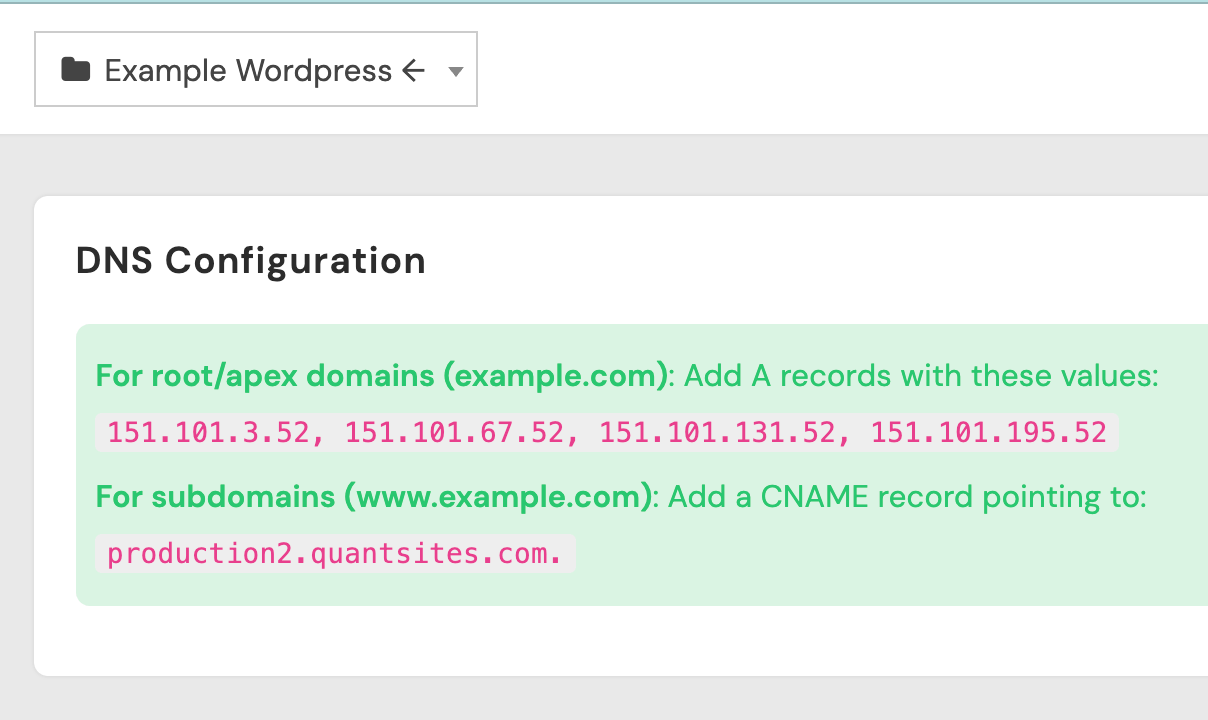
This typically involves:
- Setting up CNAME records for subdomains (like
www) - Setting up A records for root domains
Step 4: Set Up Proxy Rules
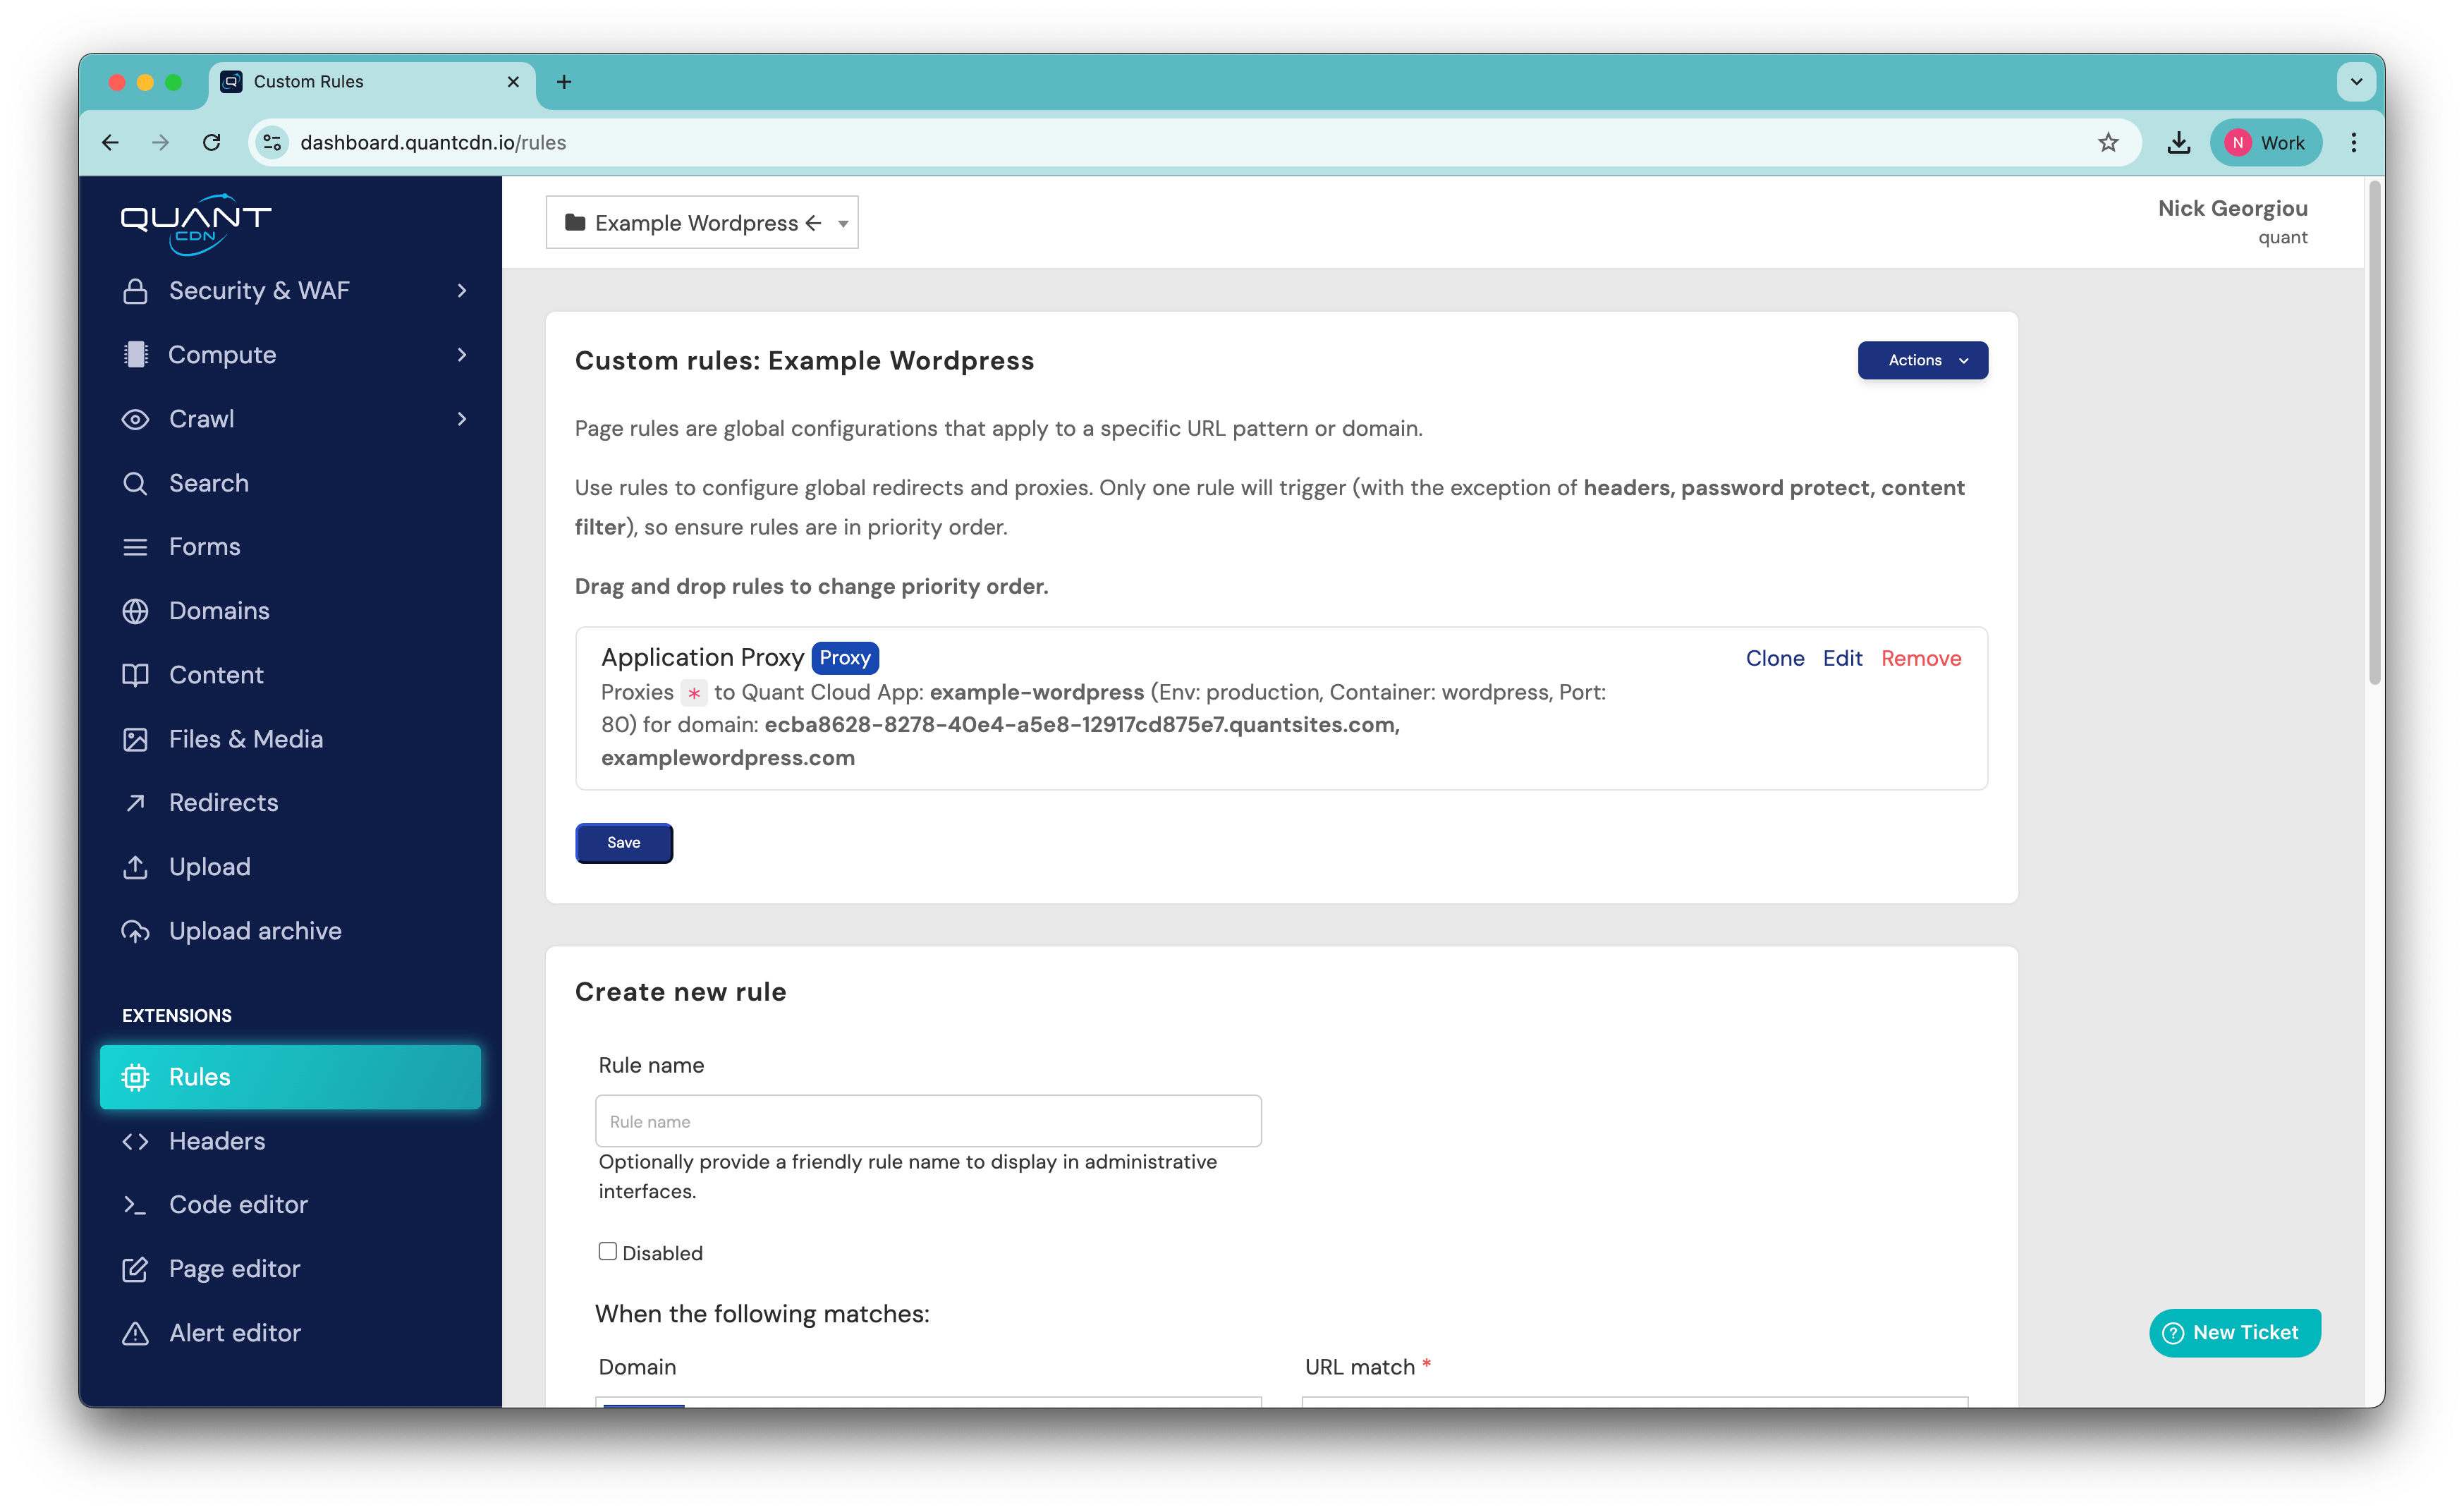
Section titled “Step 4: Set Up Proxy Rules”Configure routing rules to proxy traffic from your custom domain to your Quant Cloud application:
- Go to the Rules section of your CDN project
- Scroll down to the Create new rule section
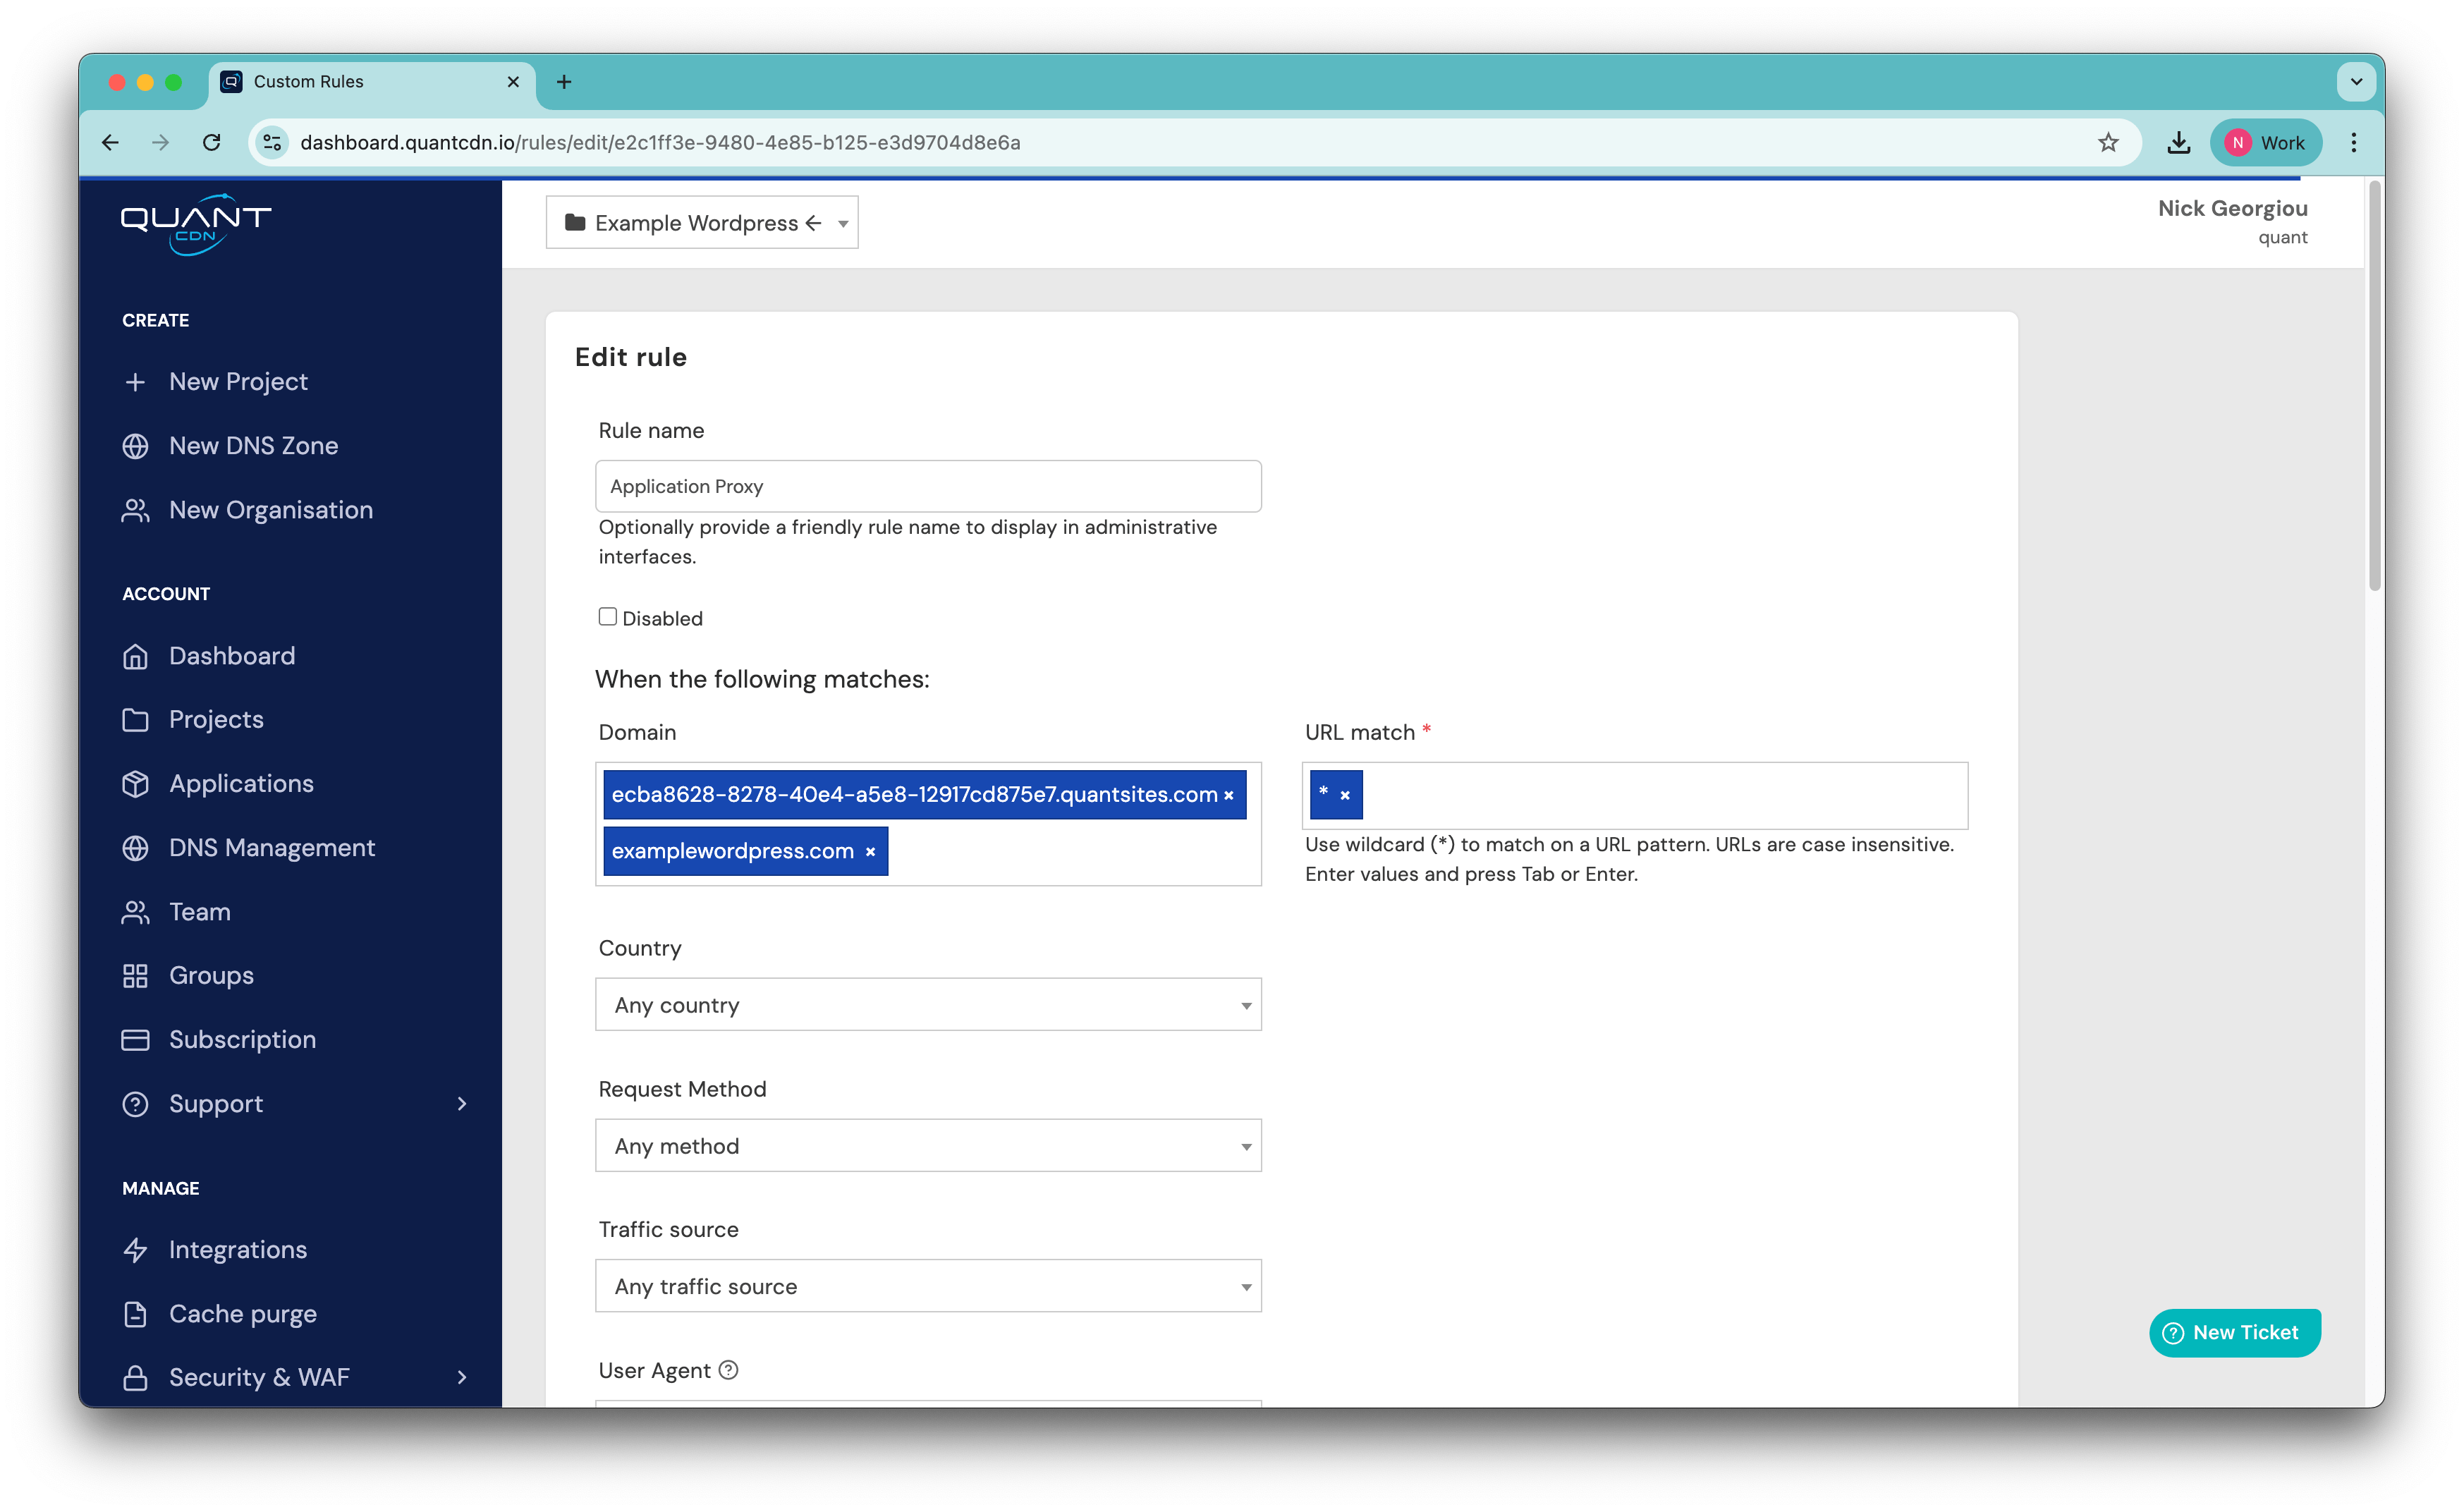
- Configure the rule:
- Rule name: Name it something recognisable like “Application Proxy”
- Match pattern: Set to match all traffic (usually
*or leave as default) - Domains: Enter your Quant Cloud application URL and custom domain
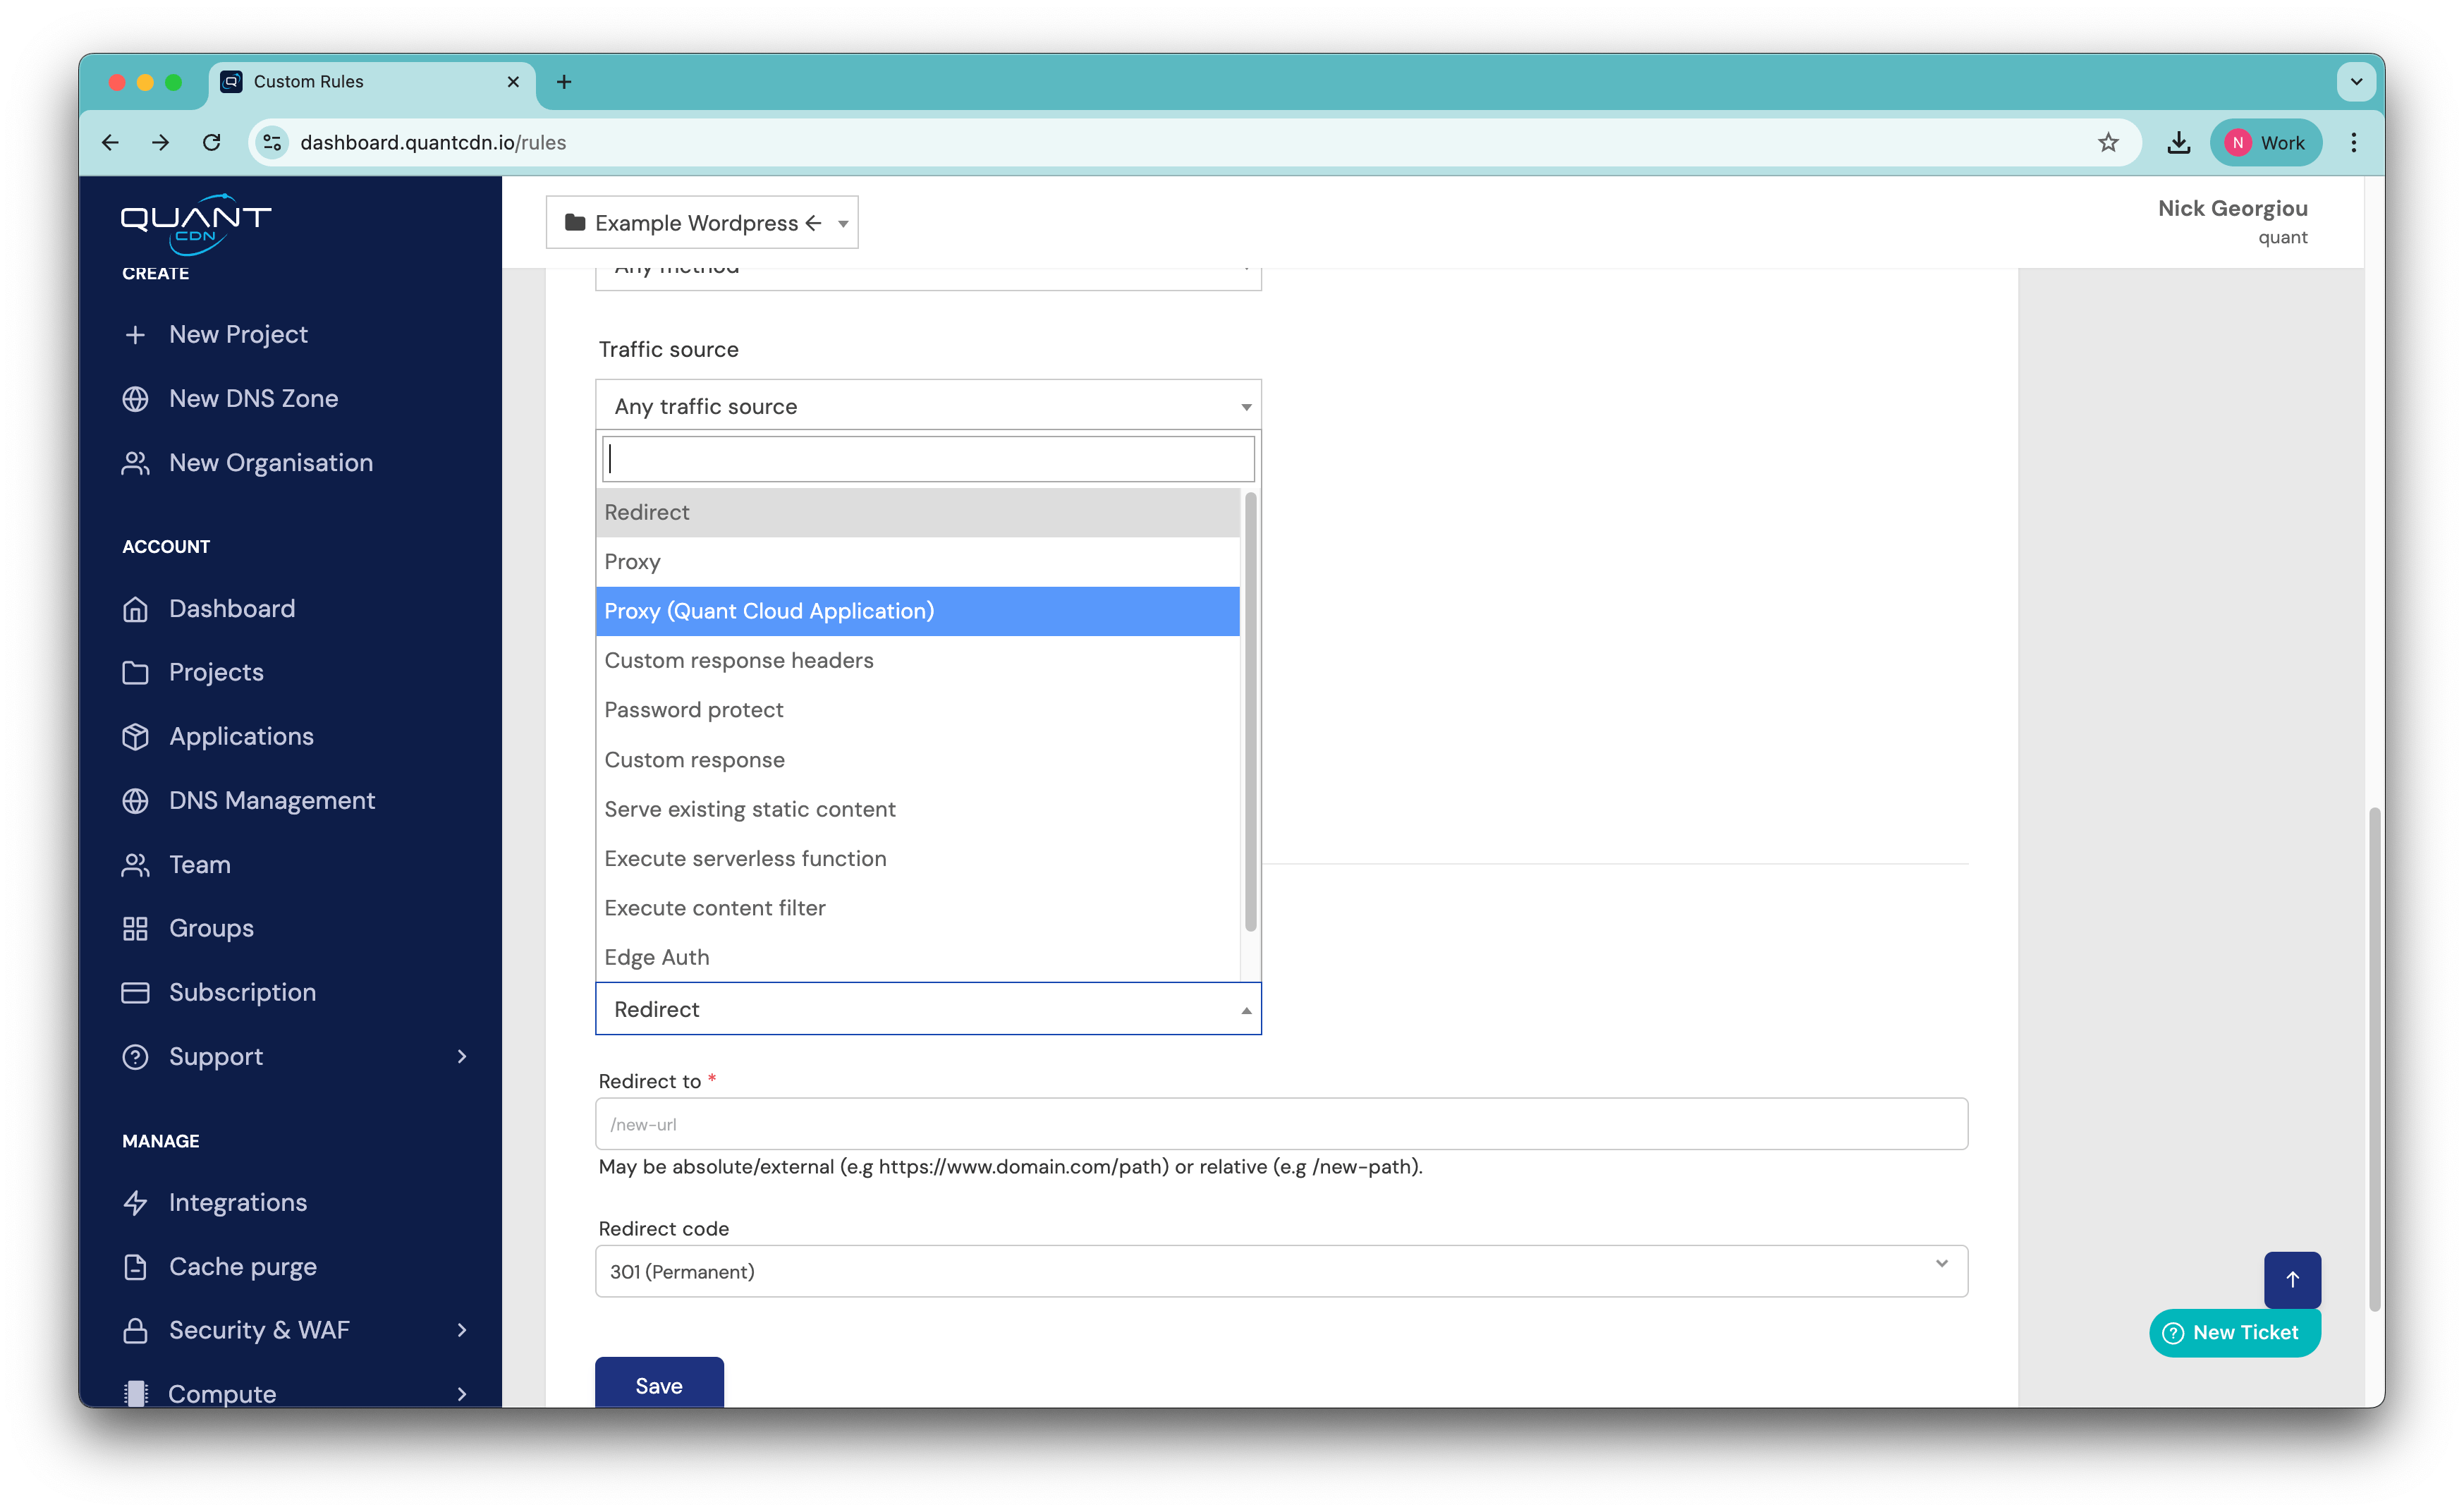
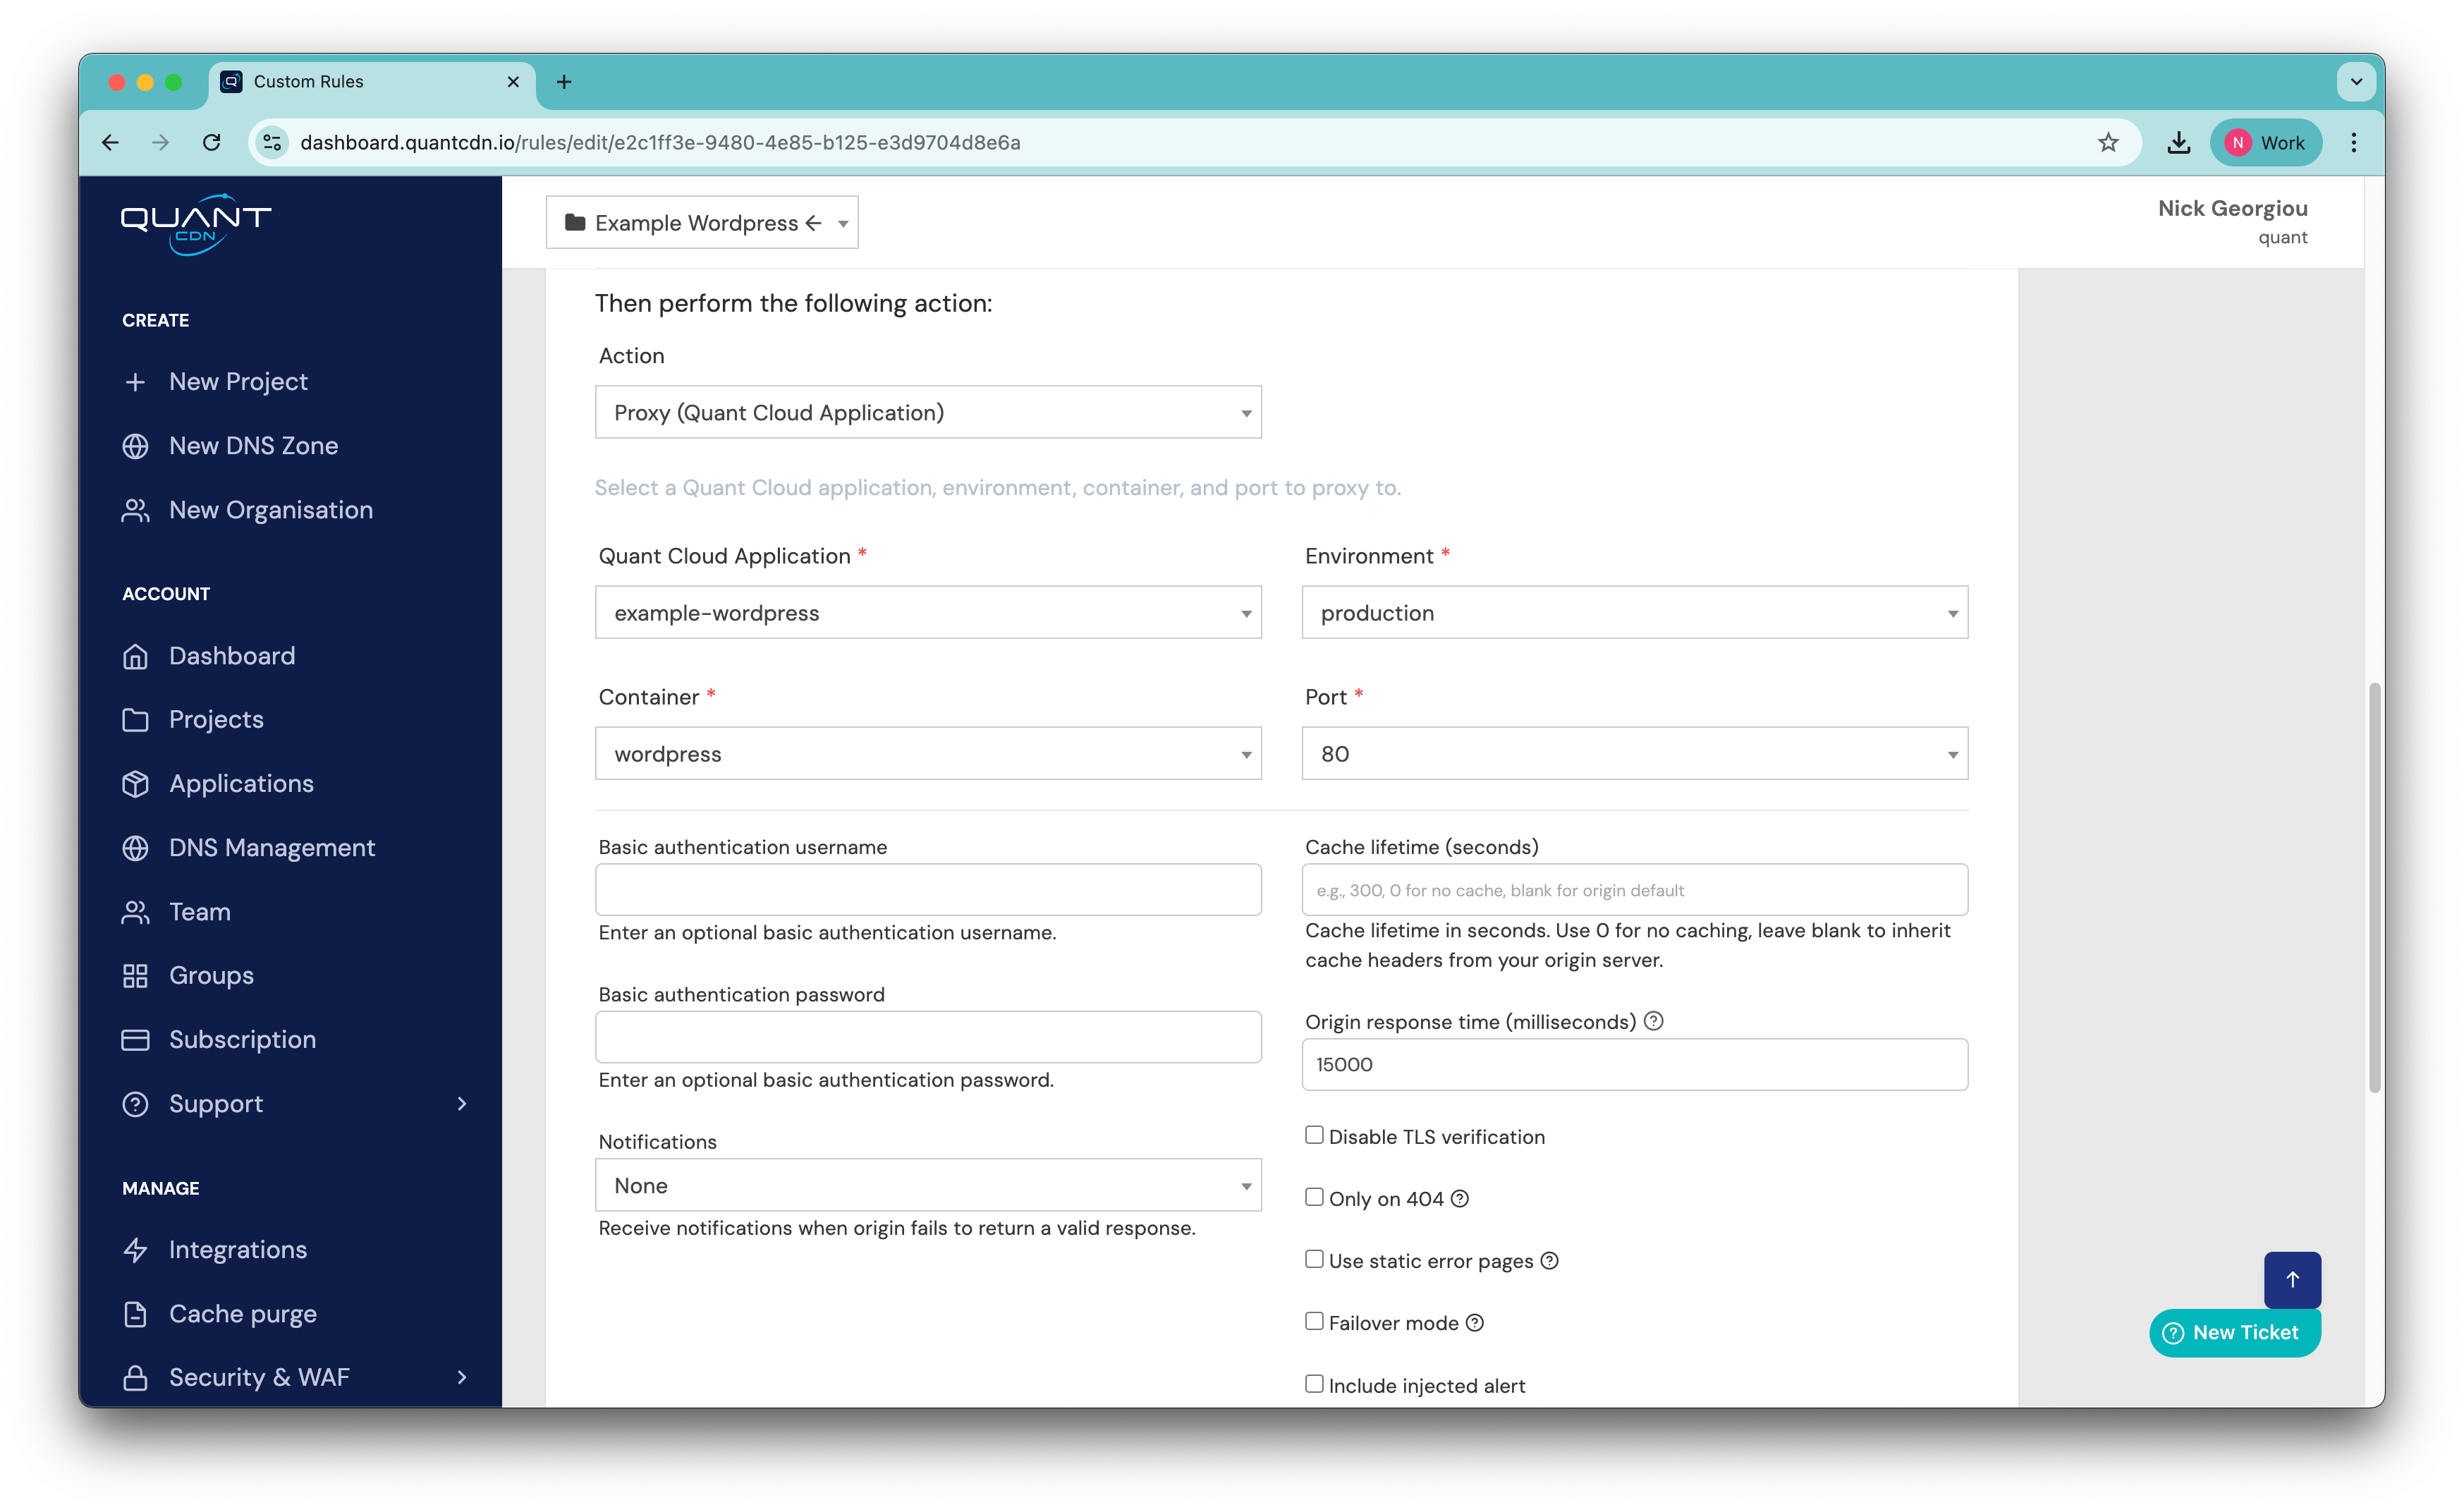
- Rule type: Select “Proxy (Application)”
- Additional settings: Configure any headers, caching, or security options as needed
- Press *Save to save the page
Step 5: SSL Certificate
Section titled “Step 5: SSL Certificate”QuantCDN automatically provisions SSL certificates for your custom domains:
- SSL certificates are automatically generated and renewed
- Your application will be accessible via HTTPS once the certificate is provisioned
- This process typically takes a few minutes after DNS propagation
Verification
Section titled “Verification”Once everything is configured:
- Wait for DNS propagation (usually 15 minutes to 2 hours)
- Visit your custom domain in a browser
- Verify that traffic is properly routing to your Quant Cloud application
- Test both HTTP and HTTPS access
- Check that all application functionality works as expected
Troubleshooting
Section titled “Troubleshooting”Domain not resolving:
- Verify DNS settings match QuantCDN’s instructions
- Check DNS propagation status using online tools
- Ensure your domain registrar settings are correct
SSL certificate issues:
- Allow time for automatic certificate provisioning
- Verify domain ownership is properly configured
- Contact support if certificates don’t provision within 24 hours
Proxy not working:
- Check that your Quant Cloud application URL is correct in the proxy rule
- Verify your application is running and accessible
- Review proxy rule configuration for any mismatched patterns
Your application should now be accessible through your custom domain!